Monthly Archives: January 2010

A Rainy January Day…

Every Saturday I make a trip into the big city to take our daughter to rehearsal for the youth symphony.  This weekend she also has a piano theory exam to take at a local college.  I’m waiting for her now.  I spend a lot of time driving and waiting for my kids at various activities these days.  It’s one of the reasons I decided to start blogging.  Recording aspects of our country life provides me with an outlet while I wait at practices, rehearsals and lessons in my crazy and chaotic modern life.

Today is a dreary and rainy winter day in Minnesota and it definitely doesn’t feel like January.  Instead, it feels more like April with its snow-melting spring rains and I’m daydreaming about spring and my gardens. I’ve started noticing the gardening magazines in the grocery store check-out line.  Although they call out to me as I stand in line, I have resisted purchasing any so far.  The seed catalogs have also started to arrive in the mail and I peruse them with grand ideas of all the different vegetable varieties I am going to try this year.

My real gardening passion is flowers.  As each growing season comes to an end, I contemplate all the things that I will grow “next year” in my flower gardens.  On this rainy day, looking at random pictures of my flowers cheers me up and inspires me for the upcoming growing season….even if it is months away.

William Baffin climbing rose and Jackmanii Clematis

Zinnias and Bachelor Buttons

Hollyhock

Johnson's Blue Geranium

Leave a comment

Filed under Flower, Gardens

A Lesson in Thai Cooking

We have known our friends Paul and Rashimah for a long time.  Paul has worked with my father in the real estate business for years and their daughter is a good friend to our daughter of the same age.  He is also an experienced beekeeper and was generous with his time and wisdom in mentoring us through our first summer with bees last year.  Rashimah is a native of Thailand and they met while Paul was working overseas.  They are kind, generous, worldly, open-minded, interesting….you get the idea.  We love being around these people.

In addition to these many great qualities, Rashimah is also an amazing cook.  Food prepared by her is always the main attraction at any potluck.  The personal favorite of myself and many others, are Rashimah’s fresh and fried spring rolls.  After searching out and occasionally attempting recipes for spring rolls, I was always left disappointed.  They were never as tasty or neatly rolled as Rashimah’s.

My sister and I finally mentioned to Rashimah that if she was willing, we would love to learn her secrets and techniques for the perfect spring rolls.  She generously offered to teach us and our schedules finally allowed us to have our lesson in Thai cooking last Sunday.  Paul and Rashimah invited us into their home, where Rashimah walked us through making fresh and fried spring rolls, Pad Thai and her version of fried rice.  I took photos along the way and my sister took notes so that we could try to produce results similar to her cooking on our own.  Rashimah sells her delicious food at various music festivals during the summer, so of course I can’t give away all of her “secrets” to the perfect spring rolls.

We enjoyed a lovely traditional Thai appetizer to start out our cooking lesson.   The platter included dried shrimp, toasted coconut, cashews, diced onions, ginger, and limes.


Rashimah demonstrates how to eat the snack by folding up the lettuce and placing a little of each ingredient inside, topped off with a drizzle of maple syrup.  She explained that in Thailand they would use some other sweetener rather than maple syrup, but since her and Paul produce maple syrup on their farm, that is what she prefers to use.  The combination of flavors and textures made a light and fresh tasting snack!

Our first lesson in Thai cooking was to learn how to make fried spring rolls.  Rashimah prepared the mixture of shredded chicken and cabbage for the filling.

She then demonstrated how to roll the spring roll tightly so that it fries up nice.  She makes it look so easy.

Next, we fried the spring rolls in hot oil until they were golden brown.

Moving on to my absolute favorite….the fresh spring rolls.  We started out by preparing a beautiful platter of fresh ingredients.  There are no hard and fast rules on what to put into the fresh spring rolls, but she had cut up chicken, fried tofu, carrots, cucumbers, lettuce, cilantro, mint and basil.  We also had thinly sliced eggs and some rice noodles to add.

In the photo below, I am carefully laying the ingredients on to the rice paper before I attempt to roll it all up.  In the past, my problem has always been that I end up tearing the rice paper as I’m rolling in the ingredients.  After watching Rashimah, I realized that I have most likely soaked the rice paper too long, thereby making it weak and more prone to tearing.  Following her example, I had no issues rolling up the spring rolls.  I still couldn’t get mine as tightly rolled as Rashimah, but she assured me that this would come with practice.

The finished product.  Beautiful.  Fresh.  Healthy.  Delicious.


Leave a comment

Filed under Cooking, Daily life, Food

To renovate or tear down? That is the question.

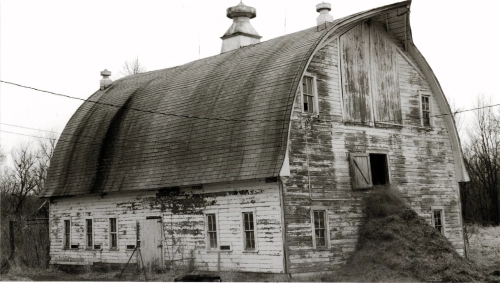
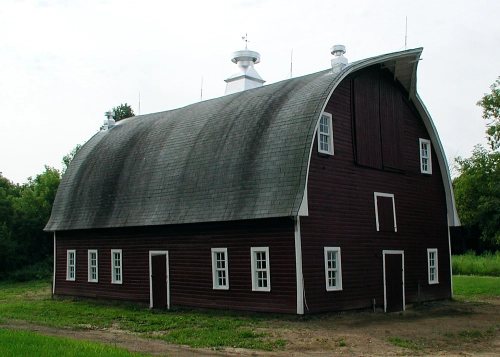
This old round-top barn on the property was one of the primary features of the old farmstead that we fell in love with.  We had all kinds of fantasies about how we would use the barn:  for horses, a sports area in the hayloft for the kids, a workshop…

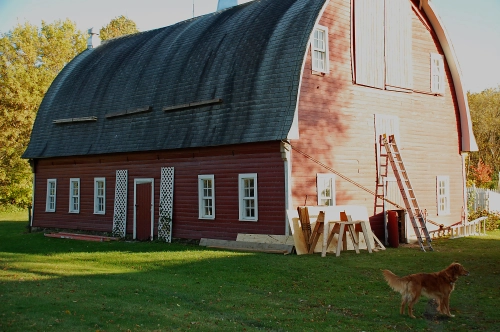
After purchasing the property, we had a barn straightener come out to evaluate the structure and give us some advice.  His conclusions were mixed.  The barn was still salvageable, but was in need of paint, a new roof, a new foundation, and straightening.  Because we were short on time (we were moving to Sweden for a two-year expatriate assignment) and money, we decided to have it painted and the windows replaced to preserve it for a later decision.

We returned to the farm from our expatriate assignment in the summer of 2003.  Our friendly old barn stood there waiting for us and for our decision on her fate.  Facing the reality of the money necessary to completely restore the barn was discouraging and seemed like a poor investment.  On the other hand, the barn is what gave our little farm its character.  Being two farm kids, it’s what drew us to this place from the beginning.  We discussed having it burned down at some point by the local fire department, but our soft spot for this structure just kept us putting off any final decision.

In the spring of last year, we experienced a nasty day with high winds gusting in from the south.  As I stood inside looking out the kitchen window, I could see shingles flying over the barn after peeling off the southern-facing roof.  With the yard littered with old asphalt shingles, I knew that a decision would soon be necessary about the fate of the barn.  The barn’s deterioration would now be quickened with the more seriously compromised roof.

After some inquiry to the insurance company, we realized that we would have some coverage for the damage caused by the wind storm to the roof.  We started gathering information and quotes on the costs of repairing the roof.  Although not the most visually appealing alternative, we concluded that the most economical approach would be to have a new steel roof put on the barn.

Prior to having the new roof installed, we hired the barn straightener to shore up the barn structurally.  The process took about two weeks.  He moved it gradually over the two weeks by bracing, pulling, and cranking it back to an upright position.  New lumber was installed inside to strengthen the structure further and hold it in its new “straight” position.

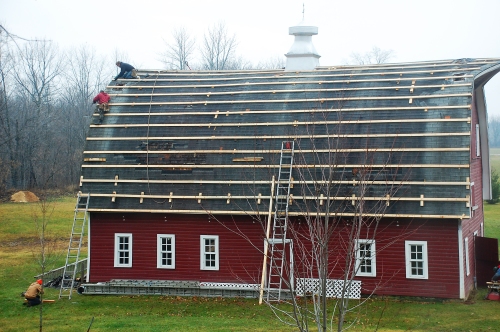
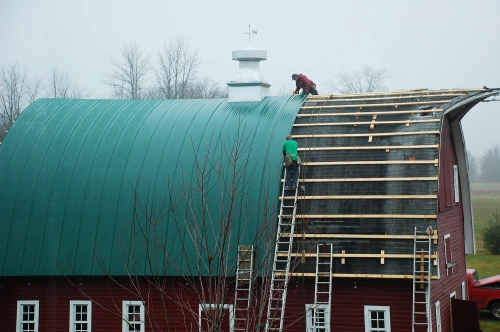
Finally sitting straight and tall, the barn was ready for its new roof.  The first step in installing the new steel roof was to put cribbing across the old roof to level everything out.  The cribbing is an efficient way to quickly cover the many sags in the roof.

The whole roof was eventually covered in the cribbing.

The roofers then began installing one sheet of metal roofing at a time.  Brave, brave men.

Rain or shine, they just kept working their way across the roof putting on the steel…

Until they finished the entire roof.  Our old barn now stands straight and tall with a new roof, waiting for us to find the time and money to take the next steps.  It might take many years to make any more progress, but at least our decision has finally been made.  We will keep the old round top barn that we fell in love with a decade ago.

1 Comment

Filed under Barn, Outbuildings

Building a smokehouse…

As a farm kid, I grew up with a smokehouse right outside the house in the front yard.  It was a small brick structure without any door.  My parents called it a smokehouse, but it was never used to smoke anything.  The sole purpose of the “smokehouse” was to burn things…garbage, boxes, etc.  Eventually they removed the smokehouse from the front yard to construct a fence.

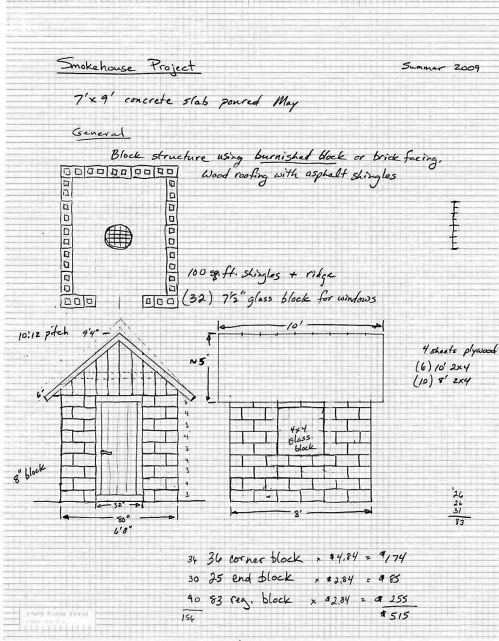
Jesse started talking about building a smokehouse soon after we bought the farm.  He finally turned his vision into a reality last summer.  After a lot of research and sketches, he came up with a design.

Smokehouse Design Sketch
Jesse already had a barrel smoker for hot-smoking or cook-smoking, but what he really wanted was a cold-smoker to be able to smoke pork sausage in the tradition that his grandfather used to do on the farm. There are also several other cold smoke products that are absolutely delicious: salmon, hams, cheese, nuts, and various sausages.

Cold-Smoking

The art of cold-smoking is to keep the meat or fish below 70 degrees F to inhibit bacteria growth and to not cook the meat product. For instance, if you would like smoked venison sausage, but don’t want to eat the complete deer all at once (who would….?), then cold-smoking will impart the desired smoke flavor and will also retain the fat inside the sausage so that it doesn’t become dry and hard. Toss cold-smoked venison sausage into the freezer until you are ready to cook it for another tasty meal.

Another example that we have become very fond of is cold-smoking 5 to 10 racks of baby back pork ribs, wrapping them in freezer paper and tossing them into the freezer. Take them out of the freezer later and bake them in the oven for a couple of hours and you have some of the best ribs ever!

Construction

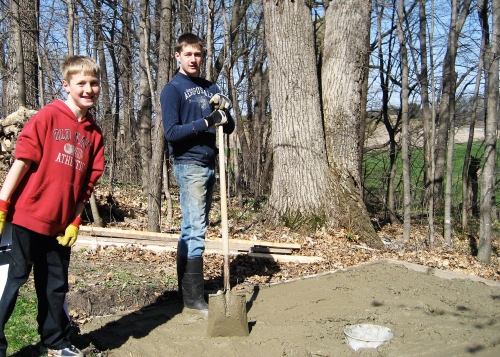
The concrete slab was poured in the spring.  Our boys learned about mixing, pouring, and finishing cement. The 5 gallon bucket in the middle of the slab is where the smoke will enter the smokehouse. The slab is what is called a “floating” slab. There is no frost footings below the slab, it is simply framed to have a 10 x 10 inch “curb” around the outside of the slab and the rest of the slab is 4 inches thick. There is also reinforcing rebar in the curb and criss-crossed across the slab. I don’t think it is going anywhere, and after one winter of freezing and thawing, there are no signs of cracking or shifting.
Jesse’s uncle, a mason by profession, came over to help in building the smokehouse.  His skills amazed us as he tossed just the right amount of the mud in just the right place.
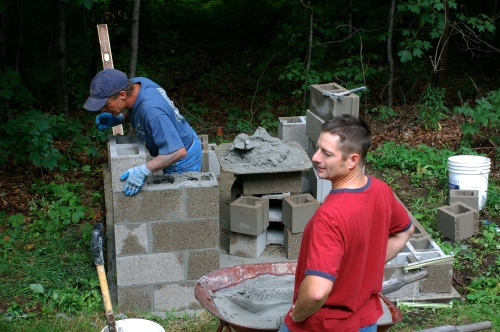
Jesse did a great job supervising….
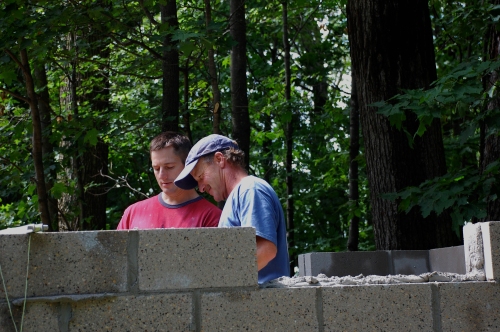
Jesse designed the smokehouse to have glass block windows to allow in natural light.  Laying the glass block was the most time-consuming part of the block laying process and the expertise of Jesse’s uncle was definitely necessary to get the glass blocks set just right.  Our son worked on smoothing the joints between the blocks.
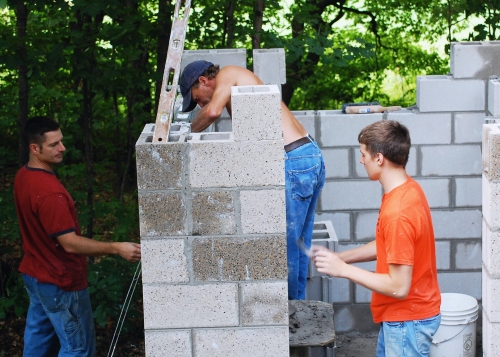
After the blocks were cured, Jesse and our son went to work building roof trusses, sheeting the roof, and laying shingles. Jesse decided to build the trusses so that the rafters could be used for hanging meat, so they are about 6 ft. high.

There are vents covered with window screen in the peak at each end of the smokehouse for draft. Jesse had built elaborate hinged doors for adjusting the draft level if needed. However, the correct draft position turned out to be full open.

Firebox

The firebox for a cold smokehouse is located away from the smokehouse to allow the smoke to cool before entering the smokehouse. The smoke from our firebox increases the temperature in the smokehouse a mere 5 to 10 deg F. This allows Jesse to safely cold smoke on days as warm as 60 degrees, but he prefers to have the outside temperature around 30 – 40 degrees.

The tricky part for the firebox is that in order to have adequate draft for the smoke to enter the smokehouse, the firebox should be located about 10 – 12 inches below the smokehouse floor and 8 – 10 feet from the center hole in the smokehouse. So the only logical way to build this operation is to locate the smokehouse on a hill or slope with enough fall to allow access to the firebox.

The firebox can be made from concrete and firebrick with a sliding steel door, but Jesse chose to use an actual home fireplace insert that someone had discarded into a road ditch. With the air intake vent controls on the fireplace he figured that he could control the fire for smoking to just the right levels (and it works perfect). He dug a hole into the side of the hill for the fireplace, and left enough room for about 2 – 3 inches of sewer rock around the fireplace to assist in water drainage around the fireplace. With the heavy gauge steel, the fireplace insert should last longer than our lifetime before it rusts out (it weighed about 5oo lbs. and had to be moved into place by a tractor).
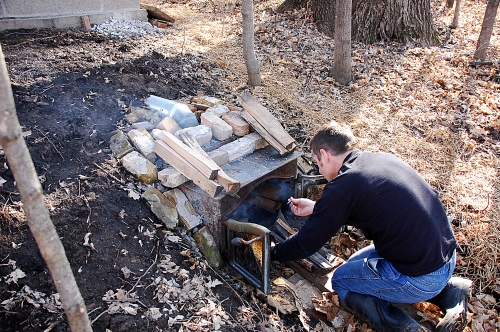
Jesse used 8 inch chimney pipe to connect the firebox to the 5 gallon bucket in the floor of the smokehouse. Obviously you want to install the pipe before you pour the concrete floor. The reason he chose the 8 inch metal chimney pipe was that the firebox had an 8 inch exit, and he needed something that would withstand the heat near the firebox. He says that he would NOT recommend using PVC or other plastic pipe as it may melt or out-gas if heated.

And here is our lovely little smokehouse in action…..
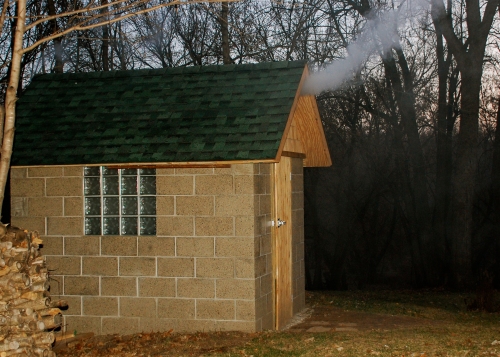
Maybe a bit over-sized for your casual home smoking, but it works GREAT!

Lynell

More on Building a Smokehouse

42 Comments

Filed under Outbuildings, Smokehouse

Pumpkin problems solved?

We have tried to grow pumpkins for the past several years and have always failed miserably.  Our first attempt consisted of digging up an area out in our field to plant a pumpkin patch.  The heavy clay soil was unfortunately not very amenable to pumpkin-growing.  Frustrated, we moved the pumpkin patch next to the barn.  Although the soil was extremely fertile as a result of years of composted manure, it seemed that we either watered them too much or not enough.  Another failure.

The following summer our mischievous free-ranging chickens pecked all the pumpkins when they were young and tender, either completing destroying them or leaving them scarred and deformed.  We tried to outsmart the girls and fenced the pumpkins off with a low fence, but they still occasionally hop the fence to snack.

Last year, some type of insect started to attack our pumpkins in the fall just as they were ripening and we lost most of them.  I wish I had taken pictures so that some other gardener out there could have helped me identify the culprits for future reference.

Even after all these failed attempts, we did not lose heart.  In spring of 2009, we once again planted several mounds of Gurney’s “Giant Magic” pumpkins.   Trying to heed the advice on the back of the seed packet and from gardening books, we tried to remember to pluck off a few of those blossoms along the way so that the plants focussed their energy on fewer fruits.  And finally….FINALLY…some success.

While I realize that these pumpkins are not perfect specimens, we were delighted with the harvest after all of our past failures.

As you can see, our youngest child was enthusiastic about the harvest and willing to help.  His dad, however, takes this farming stuff much more serious and was very pleased with our pumpkin success.   And he even got to haul them in a wagon behind his tractor…

At the end of the day, we are just two realistic farm kids.  Like the crops grown on our childhood farms, we realize that our pumpkin success this year is only partly due to our evolving gardening skills and adaptations over the past few years.  The rest of the equation is merely the whim of Mother Nature and just plain luck.

1 Comment

Filed under Gardens, Vegetable

Winter Walk

Due to the cold temperatures and the heaps of snow that were dumped on us over Christmas, we spent a lot of time around home and inside the house during winter break.  Despite the frigid weather, we were determined to get outside for fresh some fresh air.  We went for a walk down to the meandering river that runs through our property.  Our dog Sofie came along, happy to be with us. 


The river is always quite unpredictable and we never make any assumptions about its safety.  We felt fairly confident that it would be frozen quite thoroughly, but still proceeded cautiously as we walked along the ice up the river.  The only questionable areas we found were along the edges and around downed trees. 


The areas of ice that were not covered with snow were covered with beautiful ice crystal formations. 


During the summer months, the farmstead is not visible from the river bottom.   Taken from the far side of the river, this picture shows our barn through the trees. 


Leave a comment

Filed under Daily life

Keeping the chickens warm

Winters in Minnesota get cold.  Really cold.  On January 2nd, we woke up to temperatures of -30 degrees F.  We have 11 laying hens that we do our best to keep somewhat comfortable during these frigid winter months.  One of the strategies that we use is to bank snow up against the coop to help insulate and minimize any draftiness.  The walls of the coop are insulated too, which helps a lot, although I am certain that not many chicken coops were insulated on original working farms of our parent’s generation.

Inside the coop, we keep a heat lamp running to generate some heat for the chickens and to help keep the water thawed out.  Jesse also keeps the water font sitting on top of a homemade font heater for the really cold days. The font heater is made from a thermostatic controlled heating element in an upside down drain oil pan.

The windows on the coop are single pane windows, so this year Jesse decided to add an interior plexiglass panel to decrease the heat loss out the windows.  We believe it has made a big difference in helping the coop stay warmer, but we have had some condensation issues when the outside temperatures rise.

Layer chickens can drink anywhere from 1 to 2 cups of water each day.  During this latest cold snap, it seems as though the chickens have been going through a LOT of water. It is nice to have the water hydrant close to the coop for quick fill-ups.

Here are the chickens  all cozy and looking for scratch grains that I toss them for a treat.

We were away from home for one night and the chickens filled the nest boxes. You can see that we have a couple of Aracaunas that lay the green eggs.

3 Comments

Filed under Chicken coop, Chickens, Outbuildings